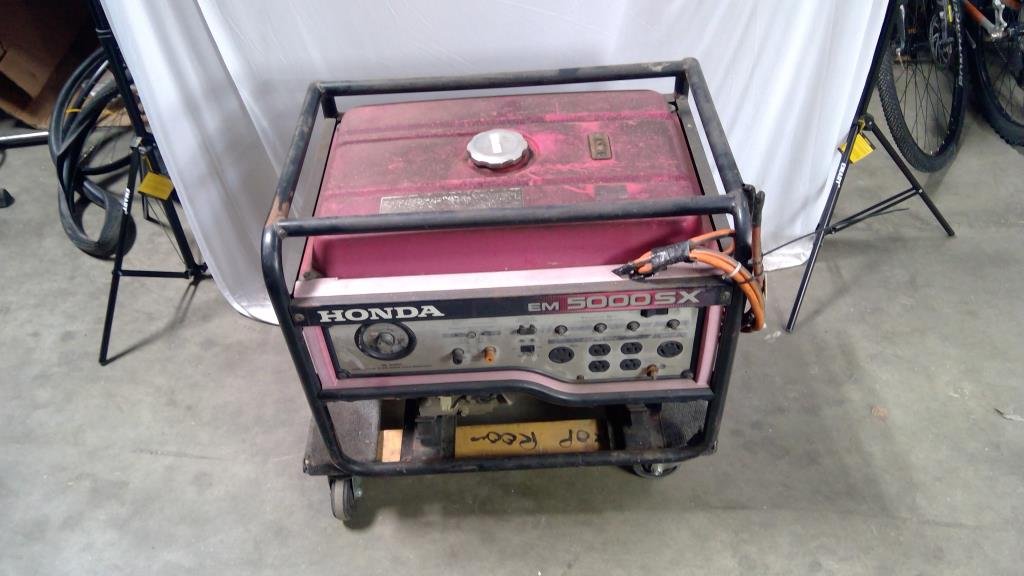
When the lights go out, your Honda 5000-watt generator isn't just a machine; it's the lifeline that keeps your home humming. But like any vital piece of equipment, it needs care. Knowing how to keep your Honda 5000-watt generator in peak condition and troubleshoot common snags is key to ensuring it always starts when you need it most. This comprehensive guide will equip you with the knowledge to maintain your generator like a pro, preventing costly repairs and extending its reliable service life.
At a Glance: Key Takeaways for Generator Longevity
- Fresh Fuel is Gold: Never underestimate the power of fresh, stabilized fuel. Old fuel is a primary culprit for starting issues.
- Regular Checks Save Headaches: Periodically inspect oil, air filter, and spark plug. Small issues caught early prevent big problems.
- Don't Overload It: Respect your generator's capacity to prevent inconsistent power and tripped breakers.
- Cleanliness is Crucial: Keep your generator, especially its air filter and fuel system, free from dirt and debris.
- Safety First, Always: Operate in a well-ventilated area, away from living spaces, and follow all grounding procedures.
- Know When to Call a Pro: Some issues are best left to certified technicians; don't push your luck with complex repairs.
Why Your Honda 5000W Deserves Attention
Your Honda 5000-watt generator is a robust machine, engineered for performance and durability. However, even the best engineering requires a human touch. Neglecting routine maintenance can lead to frustrating breakdowns, diminished efficiency, and a shortened lifespan. Think of maintenance as preventive medicine: a little effort now can save you significant time, money, and stress later when an outage hits.
A well-maintained generator is a reliable generator. It means smoother operation, consistent power output, and the peace of mind that comes from knowing your investment is ready to perform its critical duty. For a deeper dive into your specific model, check out our ultimate guide to the Honda 5000 watt generator.
The Foundation: Essential Routine Maintenance Checks
Consistent, routine care is the bedrock of generator reliability. These aren't complicated tasks, but they make all the difference.
Pre-Operation Checks: A Quick Visual Scan
Before every use, make it a habit to perform a quick visual inspection. Look for anything out of the ordinary:
- Loose parts, nuts, or bolts: Tighten anything that seems wobbly.
- Leaks: Check for drips of fuel, oil, or any other fluid around and beneath the generator.
- Damage: Inspect the frame, housing, and electrical outlets for any visible cracks, fraying, or wear.
- Fluid levels: Ensure your oil reservoir is at the correct level and that your fuel tank has enough fresh fuel.
Air Filter Care: Breathing Easy
The air filter is your engine's first line of defense against dust and debris. A clogged filter chokes the engine, leading to poor performance and even starting issues.
- Inspection: Periodically remove the air filter and hold it up to a light source. If you can't see light through it, or if it looks excessively dirty, it's time for a clean or replacement.
- Cleaning/Replacement: Many Honda filters are washable with mild soap and water, then allowed to air dry completely. Others are disposable and simply need to be swapped out. Always refer to your generator's manual for the specific type of filter and recommended service.
Spark Plug Health: Ignition Confidence
Your spark plug is vital for ignition. A dirty, worn, or incorrectly gapped spark plug can lead to misfires, rough running, and trouble starting.
- Inspection: Carefully remove the spark plug and examine its electrode. It should be light brown or grayish. Black, oily, or heavily carbonized deposits indicate a problem.
- Cleaning/Replacement: For minor carbon buildup, you can gently clean the plug with a wire brush. If the electrode is significantly worn, pitted, or damaged, replace it with a new one of the correct type and gap, as specified in your owner's manual.
Fuel System Best Practices: Power's Lifeblood
Fuel quality is paramount. It’s one of the most common reasons generators fail to start or run properly.
- Use Fresh, Clean Fuel: Always fill your generator with fresh, clean, unleaded gasoline. Fuel can degrade surprisingly quickly, especially with ethanol content.
- Store Fuel Properly: Use a clean, sealed, OSHA-approved container. Store it in a cool, dry place away from ignition sources.
- Fuel Stabilizer is Your Friend: If you plan to store your generator (or the fuel) for more than 30 days, always use a reputable fuel stabilizer. This prevents fuel degradation and gumming.
- Avoid High Ethanol Fuels: Fuel with over 10% ethanol can cause corrosion and damage to fuel system components over time. Check the pump label before fueling.
- Regular Fuel Checks: Periodically check your stored fuel for signs of dirt, water separation, or discoloration. If contaminated, dispose of it properly and use fresh fuel.
Oil Changes: The Engine's Health Tonic
Engine oil lubricates moving parts, reduces friction, and helps cool the engine. Dirty or low oil can lead to excessive wear and overheating.
- Check Regularly: Before each use and after every 8-10 hours of operation, check the oil level using the dipstick.
- Change Periodically: Consult your Honda manual for recommended oil change intervals, typically after the first 20 hours and then every 50-100 hours of operation, or at least once a year. Use the recommended oil type (e.g., 10W-30).
Cleaning Protocols: Beyond the Surface
A clean generator isn't just about aesthetics; it's about function.
- Exterior Wipe Down: Keep the generator's exterior free of dirt, dust, and grime. A damp cloth usually suffices.
- Cooling Vents: Ensure all cooling vents and fins are clear of obstructions like leaves, grass, or spiderwebs.
- Fuel Tank Cleanliness: If you suspect fuel contamination, you might need to drain and clean the fuel tank. This is a more advanced task; refer to your manual or consider professional help.
Troubleshooting Common Honda 5000W Headaches & Quick Fixes
Even with diligent maintenance, issues can arise. Knowing how to diagnose and address common problems quickly can get your power back on without delay.
Generator Won't Start? Your Go-To Checklist
This is perhaps the most frustrating problem. Here’s a systematic approach:
- Is the Fuel Tank Empty? It sounds obvious, but often overlooked. Fill it up with fresh fuel.
- Is the Fuel Old? Fuel degrades, especially without stabilizer. Drain old fuel and refill with fresh.
- Choke Position Correct? For a cold start, the choke lever should be set to "closed" (choke ON). Once the engine warms, move it to "open" (choke OFF).
- Dirty Air Filter? A clogged filter restricts airflow. Clean or replace it.
- Battery Issues? A weak or dead battery is a common culprit for electric-start models. Check its charge and connections.
- Engine Switch ON? Ensure the engine switch is in the "ON" or "RUN" position.
- Fuel Valve Open? Confirm the fuel valve is turned to the "ON" position.
- Spark Plug Condition? Inspect the spark plug for fouling or damage. Clean or replace if necessary.
Quick Start Guide Reminder:
- Turn the fuel valve to "ON".
- Set the choke lever to "CLOSED" (if cold).
- Turn the engine switch to "ON".
- Pull the starter grip lightly until you feel resistance, then pull briskly.
Generator Running Rough or Won't Stay Running?
Once it starts, you want it to purr. If it struggles, check these:
- Dirty Fuel: Contaminated or old fuel causes inconsistent combustion. Drain and replace.
- Clogged Air Filter: Still a common issue, restricting air. Clean or replace.
- Faulty Spark Plug: A worn spark plug can't maintain a consistent spark. Clean or replace it.
- Low Oil Level: Many Honda generators have a low-oil shutdown feature to protect the engine. If the oil is low, it simply won't stay running. Check and refill.
Inconsistent Power Output: What's Happening?
If your appliances are flickering or not getting enough juice, here's what to investigate:
- Overloading: You might be trying to power too many devices. Unplug some appliances to reduce the electrical load and check your generator's capacity limits. Reset the circuit breaker if it tripped.
- Voltage Selector: Ensure the voltage selector switch (if your model has one) is set correctly for your region (e.g., 120V or 240V).
- Wiring Issues: Inspect all wiring for loose connections or visible damage. A frayed wire can disrupt current.
- Low Oil Levels: Again, low oil can trigger protective shutdowns or erratic performance. Check and refill.
- Dirty Spark Plug: An inefficient spark plug can lead to inconsistent engine performance, which translates to uneven power output. Clean or replace.
- Overload Alarm: If your generator sounds an overload alarm, immediately reduce the electrical load by unplugging some devices. Then, reset the circuit breaker.
Leak Detection: When Your Generator Weeps Fuel
A fuel leak is a serious safety concern. If you detect one, immediately turn off the generator and address it. Potential causes include:
- Loose Fuel Line Clamps
- Damaged Fuel Lines
- Cracked Fuel Tank
- Faulty Fuel Valve
- Carburetor Issues (e.g., stuck float, worn gasket)
- Worn O-rings or Gaskets
- Overfilling the Fuel Tank
- Loose Spark Plug (can seem like a leak)
Focus on visible areas first. If the source isn't obvious, avoid sparks and open flames, and consider professional help.
Battery Blues: Why Your Generator Battery Dies
For electric-start models, a dead battery means no start. Two primary causes are:
- Lack of Charge: The battery simply needs recharging.
- Poor Connections/Corrosion: Loose or corroded terminals can prevent a proper charge or draw. Clean and tighten them.
Unusual Noises or Overheating?
These are red flags that warrant immediate attention.
- Overheating:
- Check Coolant Level: If it's a liquid-cooled model, ensure the coolant reservoir is at the correct level.
- Inspect Radiator/Cooling Fins: Make sure the radiator and cooling fins are clean and free of debris.
- Verify Cooling Fan: Ensure the cooling fan is operating correctly.
- Engine Oil Level: Low oil causes increased friction and heat. Check and refill.
- Unusual Noises:
- Loose Components: Often, strange noises are just loose screws, bolts, or covers. Inspect and tighten them.
- Engine Knocking: This can be a serious issue, often indicating low oil or poor fuel quality. Check and refill oil, and replace fuel.
- Vibrations: Inspect engine mounting and alignment.
- Worn Bearings/Parts: Listen for grinding or squealing that might indicate worn internal components needing replacement.
Diving Deeper: System-Specific Troubleshooting
Sometimes, the problem requires a more focused approach on a particular system.
Fuel System Faults: Keeping the Lifeblood Flowing
Beyond just 'old fuel,' specific fuel system issues can plague your generator.
- Fuel Quality: Reiterate the importance of fresh, clean fuel. Remember: use stabilizer for storage over 30 days, avoid over 10% ethanol, and regularly check for contamination.
- Clogged Fuel Lines:
- Safety First: Turn off the generator and allow it to cool completely.
- Locate Lines: Identify the fuel lines running from the tank to the carburetor.
- Inspect: Look for visible kinks, blockages, or debris.
- Clean (Carefully): For minor clogs, you might be able to use a small brush or gently blow compressed air away from the fuel tank to clear the line. Be extremely cautious.
- Reassemble & Test: Reconnect lines securely and test. Periodically inspect fuel lines for wear and tear.
Electrical System Glitches: Powering Up Safely
Electrical issues can be tricky and potentially dangerous.
- Battery Issues (Detailed):
- Voltage Check: Use a multimeter to check battery voltage. A fully charged 12V battery should read around 12.6 volts. Below 12 volts usually means it needs charging or replacement.
- Corrosion: Inspect battery terminals for white or greenish corrosion. Clean with a wire brush and a baking soda/water solution.
- Connections: Ensure battery cables are tight and making good contact.
- Faulty Wiring:
- Visual Inspection: Look for frayed wires, loose connections, or burnt spots (indicating a short circuit).
- Replacement: Immediately replace any frayed or burnt wiring. Tighten any loose connections.
- Continuity Check: If you suspect an internal wiring break, a multimeter can check for continuity. This is a more advanced troubleshooting step.
Engine Performance Woes: Beyond the Basics
When the core engine isn't performing, it's time for a closer look.
- Overheating (Detailed):
- Coolant Level: Ensure correct levels in models with liquid cooling.
- Radiator/Fins: Keep them spotless.
- Cooling Fan: Verify it's spinning freely and operating.
- Engine Oil Level: A crucial check, as low oil significantly increases engine heat.
- Unusual Noises (Detailed):
- Loose Components: Double-check external covers, mounts, and accessories for tightness.
- Engine Knocking: Often due to detonation from low-octane fuel, old fuel, or severe lack of oil. Address immediately.
- Mounting/Alignment: Vibrations can sometimes point to improper engine mounting or alignment.
- Worn Bearings/Moving Parts: If you hear persistent grinding, squealing, or rattling from within the engine, it's likely an internal component like a bearing or valve that needs professional attention.
- Rough Running (Recap): Always start with the basics: clean fuel, a clean air filter, and a healthy spark plug. These are the "big three" for smooth engine operation.
The Lifespan Boost: Replacing Parts & Proactive Care
Knowing how to source and replace parts effectively can save you money and keep your generator in service.
Identifying the Right Parts
- Consult Your Manual: Your Honda generator manual is the authoritative source for part numbers. It lists every component specific to your model.
- Official Sources: Check Honda’s official website or authorized dealer networks for genuine replacement parts.
- Trusted Online Marketplaces: Reputable online parts retailers can also be a good source, but always double-check compatibility with your specific model number.
- Local Hardware Stores: For common consumables like spark plugs or certain air filters, your local hardware store might carry compatible options.
Step-by-Step Installation Basics
While specific instructions vary by part, the general process is universal:
- Safety First: Ensure the generator is completely off and cool to the touch. Disconnect the spark plug wire to prevent accidental starting.
- Gather Tools: Have the necessary screwdrivers, wrenches, pliers, and any other specialized tools ready.
- Follow the Manual: Refer to your generator's manual for precise removal and installation steps for the specific part.
- Careful Removal: Carefully remove the old part, noting how it was connected or oriented. Take photos if it helps.
- Install New Part: Place the new part, ensuring all connections, screws, and bolts are tight but not overtightened.
- Test: Reconnect the spark plug wire, follow the starting procedure, and test the generator for proper function.
Regular Inspections & Cleaning: A Proactive Summary
To summarize the proactive approach, remember these key takeaways:
- Inspections: Regularly check for loose parts, fluid leaks, and any visible damage. Pay close attention to the air filter, oil level, and spark plug.
- Cleaning: Keep the exterior, air filter, and fuel tank clean. Clear cooling fins and vents to prevent overheating.
Safety First: Operating and Storing Your Generator Responsibly
Generator safety is non-negotiable. Carbon monoxide poisoning, electrocution, and fire are real risks.
Safe Operation: Power with Caution
- Read the User Manual: This is your primary safety document. Familiarize yourself with all warnings and operating instructions.
- Wear Protective Gear: Always wear appropriate gloves and safety glasses when performing maintenance or handling fuel.
- Stable, Flat Surface: Operate your generator on a stable, level surface to prevent tipping and ensure proper lubrication.
- Never Operate in Wet Conditions: Rain, snow, or wet ground can lead to electrocution. Protect your generator from moisture.
- Keep Children and Pets Away: Establish a safe perimeter around the operating generator.
- Ground the Generator Properly: Always follow grounding instructions to prevent electrical shock.
- Outdoor Use ONLY: Generators produce carbon monoxide, an invisible, odorless, deadly gas. NEVER operate a generator inside a home, garage, shed, or any partially enclosed area. Position it far from windows, doors, and vents.
Smart Storage: Ready for Next Time
- Dry, Well-Ventilated Area: Store your generator in a dry, well-ventilated location, free from direct sunlight or extreme temperatures.
- Inspect Before Use: Always give the generator a quick inspection for damage or leaks before bringing it out of storage.
- Fuel Treatment for Storage: If storing for an extended period, treat the fuel with stabilizer, run the engine for a few minutes to circulate it, or drain the fuel completely.
Emergency Protocol: When Things Go Wrong
- Immediate Shutdown: If you notice smoke, fire, excessive noise, or a strong fuel smell, immediately turn off the generator and disconnect all appliances.
- Safe Distance: Move to a safe distance and assess the situation.
- Fire/Smoke: If there's a fire, do not attempt to extinguish a large fuel fire yourself. Call emergency services. For small fires, use a class B or C fire extinguisher if you are trained and it's safe to do so.
- Fuel Leaks: For fuel leaks, avoid all sparks and open flames. Ventilate the area. If significant, contact emergency services.
- Emergency Contacts: Keep emergency contact numbers readily accessible.
When to Call in the Pros: Recognizing the Limits
While DIY maintenance can solve many problems, some situations absolutely require the expertise of a professional technician. Knowing when to step back can prevent further damage and ensure your safety.
Situations Requiring a Technician
- Persistent Engine Problems: If your generator consistently fails to start, runs erratically, or stalls despite your best troubleshooting efforts (fresh fuel, clean filter, new spark plug).
- Electrical Issues: If the generator produces no electricity, or you suspect internal wiring problems, faulty outlets, or major voltage fluctuations. These can be dangerous to diagnose without proper training and equipment.
- Fuel System Issues: Beyond a simple clogged line, if you have persistent fuel leaks, excessive fuel consumption, or complex carburetor problems, a professional can diagnose and repair safely.
- Unusual Noises from the Engine or Internal Parts: Grinding, squealing, or knocking from within the engine often indicates internal wear or damage that requires specialized tools and knowledge to repair.
- After Major Impact or Damage: If the generator has been dropped, involved in an accident, or shows significant structural damage.
Choosing a Reputable Service Center
- Check Credentials: Look for service centers authorized by Honda. These technicians are factory-trained and use genuine parts.
- Read Reviews and Ratings: Online reviews can provide insight into customer service, repair quality, and turnaround times.
- Compare Costs and Services: Get quotes from a few different centers for comparison.
- Ask About Warranty: Inquire about warranties on both parts and labor for any repairs performed.
Your Generator's Future: A Final Word on Reliability
Maintaining your Honda 5000-watt generator doesn't have to be a chore; it's an investment in reliable power. By following these tips and understanding basic troubleshooting, you're not just fixing problems—you're preventing them. Regular checks, fresh fuel, and a proactive approach ensure that when the unexpected happens, your generator stands ready, a steadfast beacon of power in the darkness. Treat it well, and it will serve you faithfully for years to come.